Fitting Coving To Painted Walls

Ceiling & coving finished in Dulux Trade Vinyl Matt Pure

Noah's new nursery color Sandstone Cove Tall

Picture (With images) Dulux white paint, Chalk white

Cute idea maybe in white and light gray Dining room

A calm and tranquil spare bedroom. Elephant’s Breath walls

Grey walls with dark grey woodwork, skirting and coving
Bear in mind that for an internal corner, the wall edge of the coving is longer than the ceiling edge. For an external corner, the ceiling edge is longer than the wall edge; If you are using pre-formed internal and external corners, follow the manufacturer’s instructions on the preferred order of fitting corners and straight lengths of coving
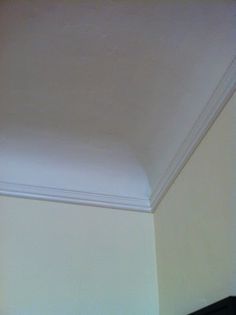
Fitting coving to painted walls. Particularly if your walls are a darker colour than the ceiling, in which it can become more noticeable. Also, if you’re doors and frames are white, such as mine below, it allows the colours to pop more in a room. In fact, I painted the walls first before fitting the coving. Fitting the coving. Use a 100mm length of coving as a template to mark the top and bottom edges of the coving on the walls and ceiling of your room. Make the marks at regular intervals and join them together with a straight edge. Remove any loose wallpaper or flaky paint. Then score between the lines with a craft knife to give a key for the. Plaster coving works like interior moulding trim to provide an extra accent to ordinary walls. The plaster composition allows for intricate patterns that can add a sophisticated touch of beauty. You can add colour to your covings, using paint. Unfortunately, plaster tends to excessively absorb primer and paint. Its best to have the coving up first, as there will be a little bit of mess on the walls with the adhesive, specially if he is a messy bu55er lol Then hang your lining paper up to the edge of the bottom of the coving,, when finished lining, and the paper is completely dry, get some decorators caulk and a gun, and go round the top of the lining.
The ceiling and the coving have been painted white and hubby is now ready to cut-in along the walls with a coloured paint. He is adamant that the lower, return lip of the coving should be painted to match the wall colour. I, on the other hand, firmly believe that it should be the same colour as the ceiling.. Hi there Take off all old skirtings and architraves, then the electrician to first fix, run wires and fix boxes. After that, get the room plastered and fix the coving, you could then give all the walls a mist coat of paint - 50% water, 50% matt emulsion, then fit your skirtings and architraves as well as fitting electric face plates switches. Usually your coving or cornice will be painted a different colour to the wall to create contrast. It is recommended that you leave at least 24 hours after installation before painting your coving, as this allows time for the adhesive to set properly. Paint the coving and the ceiling, then go and get the wallpaper. Try to put the coving up straight, just because the walls are all over the place doesnt mean your coving should follow that rule. I have used the coving which is a fire resistant polystyrene, covered in a white paper finish. It is not heavy and looks fine.
Plaster coving is often used to provide the finishing touches to a room. Coving is a decorative feature fitted to the top of the wall where it meets the ceiling. Coving is often considered a period feature, although it does have a place in contemporary finishes also. Job: Description: Labour: 1: Fit coving all round a normal sized room, with a bay window and chimney breast. . One man can’t do it on his own, the covings will snap, the adhesive will get everywhere, the air will turn blue, the man will storm out and three hours later the pub will be better off by £50.00! That makes fitting the coving a little finicky because right-angled pieces will not join up perfectly when fit to a crooked wall, and gaps show where the ceiling and walls are not level or even. The adhesive to go with the coving (sold separately) can also be used to fill and smooth over those gaps. Measuring for Coving and Marking Walls for Coving. Using these lines as a guide, mark along the wall and ceiling using a spirit level to make sure your line is level and straight. Alternatively you could use a chalk line held between two panel pins at either end of the wall). These lines are what you will work to when it comes to sticking.
- Apply adhesive to the coving flat surfaces and trowel with a tiling trowel to leave lines in the adhesive. - Lift to the wall, line up the ends and hammer nails into the far ends of the plaster. - Ensure that the coving is firmly pressed against the wall and hammer in additional nails evenly along the coving. If the walls are particularly uneven, try using tile adhesive to give a thicker bed for the coving to sit in. Fitting Plaster Coving. As with polystyrene coving, start in the corners if you have ready-made pieces. Plaster coving requires special adhesive, spread on the back edges of the mouldings. Coving - preparation walls and ceilings . Coving is fairly easy to put up given a planned approach, patterned cornice is harder to put up because of the need to match the pattern at corners.. Always read any manufacturers instructions supplied with the coving, while the following may be more comprehensive than most manufacturers instructions, there may be specific considerations particular to. If you are confident you can get the coving up first time without having to adjust it too much then don't seal the plaster,but if you think you might need a bit more working time, seal the ceiling edgers with an emulsion mist coat first, this will also stop the adhesive/artex from drying so quick and give more time to get clean/neat edgers.

Ceiling Roses on wall for decoration (With images

Behr Sandstone Cove My Paint Colors Home, Interior, House

Elephant’s Breath walls and Dimity woodwork. Ceiling is

Coving … Cornice design, Coving ideas, Cornices ceiling

XPS Polystyrene Coving Cornice BSX2 Polystyrene coving

Character and Color A Creative Remodel Transforms This

Coved ceilings painted don't paint cove and trim the

Plaster Cornice Victorian 197mmx2.5m CS3069 Plaster

XPS Polystyrene Coving Cornice BSX1 Polystyrene coving

Paint your skirting board the same colour as the other
Coved ceiling with molding Home Improvement in 2019

C393 Large Stepped Coving Coving ideas, Cornice design

Large Dentil Coving C141 Ceiling design, Plaster coving

Grey landing carpet fitted to match yellow painted walls
